Share This Pattern :
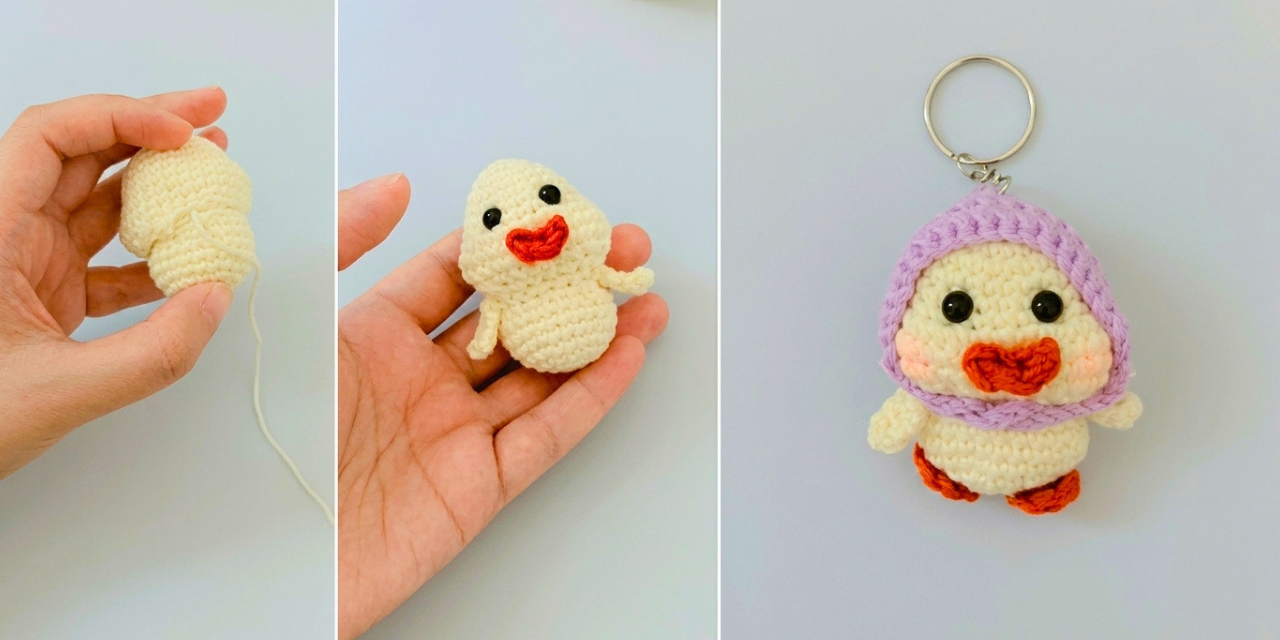
A tiny crochet project that is quick to finish and absolutely impossible not to love, this mini duck is exactly what you need. It works up fast, the pieces are all small and manageable, and the finished duck is just the right size to sit on a shelf, hang as a bag charm, or give as a gift.
I made this one in beige with an orange beak and feet, but honestly it looks adorable in any color. Grab your hook and let’s get into it!
Materials Needed
- Light weight cotton yarn
- Small amount of orange or contrasting yarn for the beak and feet
- Crochet hook 3.0 mm (match to your yarn weight)
- Safety eyes (small)
- Polyfill stuffing
- Yarn needle
- Scissors
Abbreviations Used (US Terms)
- MR = Magic Ring
- sc = single crochet
- inc = increase (2 sc in same stitch)
- dec = decrease (invisible decrease)
- ch = chain
- slst = slip stitch
- st = stitch
- R = Round
- FO = Fasten off
Pattern Instructions
Now we have everything we need, let’s get into the actual pattern. we will make the pieces separately then join them by either sewing or glue, it’s totally optional.
Head
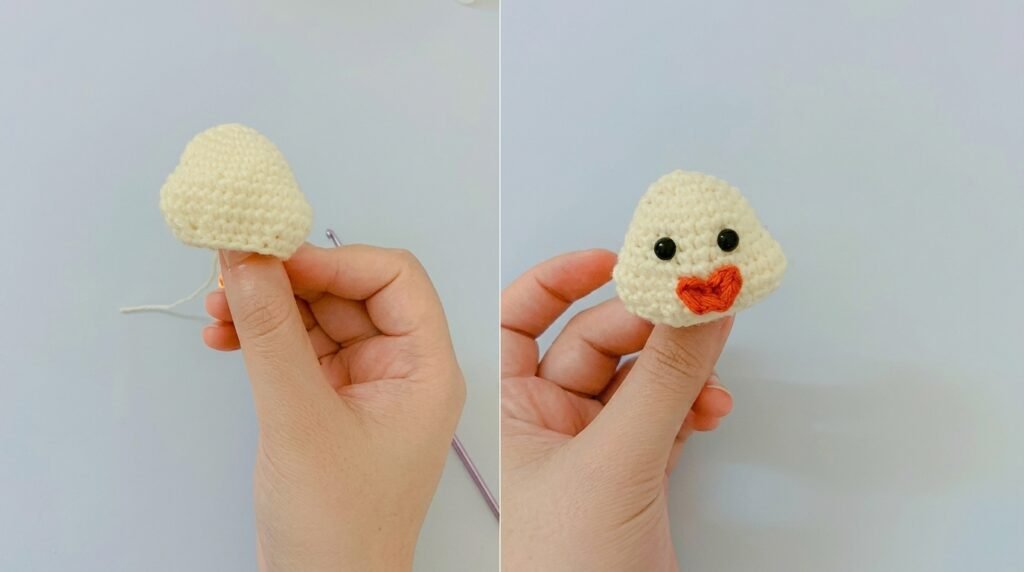
R1: MR, 6 sc into MR (6)
R2: 6 inc (12)
R3: (sc, inc) × 6 (18)
R4: (sc, inc, sc) × 6 (24)
R5–R7: 24 sc (24)
R8: 6 sc, 4 inc, 4 sc, 4 inc, 6 sc (32)
This round gives the head its chubby cheek shape.
R9–R10: 32 sc (32)
R11: 6 sc, 4 dec, 4 sc, 4 dec, 6 sc (24)
R12: (sc, dec, sc) × 6 (18)
We will not be closing here, instead attach your safety eyes between rounds 7 and 8, right in the middle of the cheek section. Stuff firmly, then attach the mouth and wait till finishing the body, You can use a black thread to make eyes but safety eyes of a suitable size make a better looking duck.
Body
R1: MR, 6 sc (6)
R2: 6 inc (12)
R3: (sc, inc) × 6 (18)
R4: (sc, inc, sc) × 6 (24)
R5–R7: 24 sc (24)
R8: (sc, dec, sc) × 6 (18)
Stuff the body and fasten off, leaving a long tail for sewing.
Hands (Make 2)
Ch 5, skip a ch, work 3 sc, 3 sc in the last chain (to turn the corner), 3 sc back along the other side.
Slst to join and fasten off, leaving a tail for sewing. No stuffing needed.
Feet (Make 2)
R1: MR, 6 sc (6)
Slst to join and fasten off, leaving a tail. These stay flat and small — that is exactly the look you want for a mini duck.
Mouth
Ch 4, then: 2 sc, slst.
Fasten off leaving a tail. Sew this onto the center front of the face, right below the eyes between the two cheek sections. I used 2 sizes up for the mouth to give her a filler 🤣👄. If you do not like it just use the same size yarn and hook.
Hat
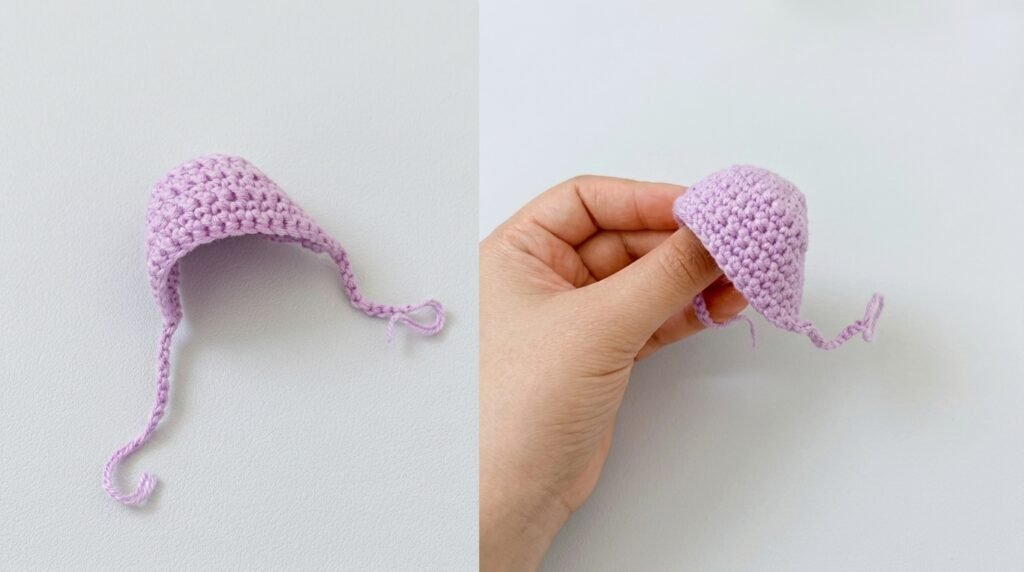
R1: MR, 6 sc (6)
R2: 2 sc into each stitch (12)
R3: (sc, inc) × 6 (18)
R4: (2 sc, inc) × 6 (24)
Make 3 sc, then ch 1 and turn your work.
R5: 21 sc, ch 1, turn work
R6–R10: 21 sc, ch 1, turn work
To make the hat band: chain 11 stitches on each side of the hat and tie them in the middle.
Fasten off and weave in ends.
The hat sits right on top of the head and gives this little duck so much personality. You can skip it for a plain duck, or even make it in a different color for variety, add your own touch if you like like a little bow or headphones.
Assembly
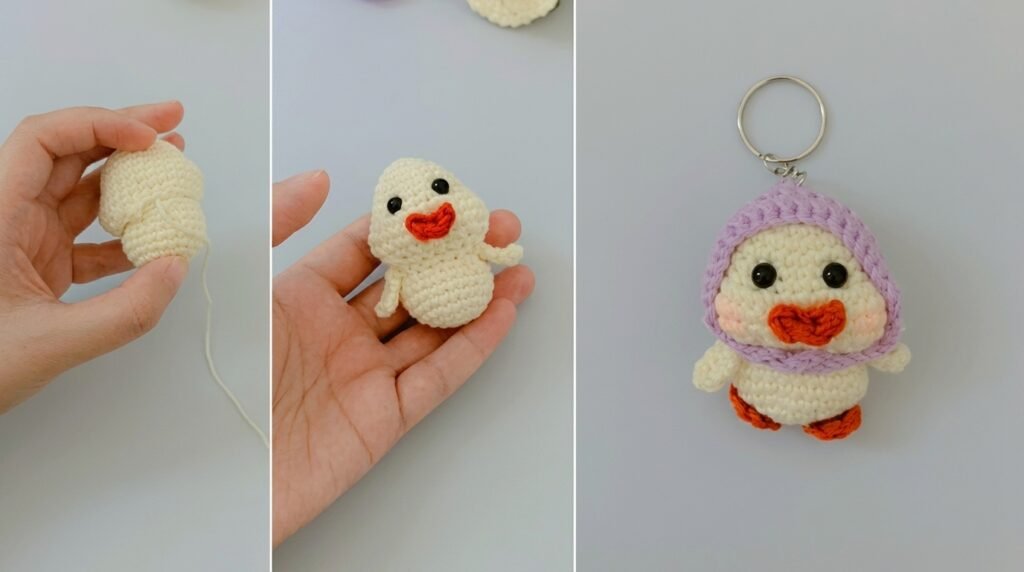
Once all your pieces are crocheted and stuffed:
- Eyes and mouth first — before closing the head, place your safety eyes between rounds 7 and 8 in the center. Sew the mouth just below, centered between the cheeks.
- Attach the head to the body — sew the body and head after stuffing both of them, the both have the same stitches at the last round so you should be able to attach each stitch against the opposite one.
- Sew the feet to the bottom of the body pointing outward.
- Attach the hands on either side of the body.
- Place the hat on top of the head and sew or glue it at an angle for extra charm.
Watch the Assembly Tutorial
Seeing all the pieces come together is so much easier with a visual. I have a full assembly video on my YouTube channel — I will drop the link right here so you can follow along stitch by stitch:
Happy crocheting🧶