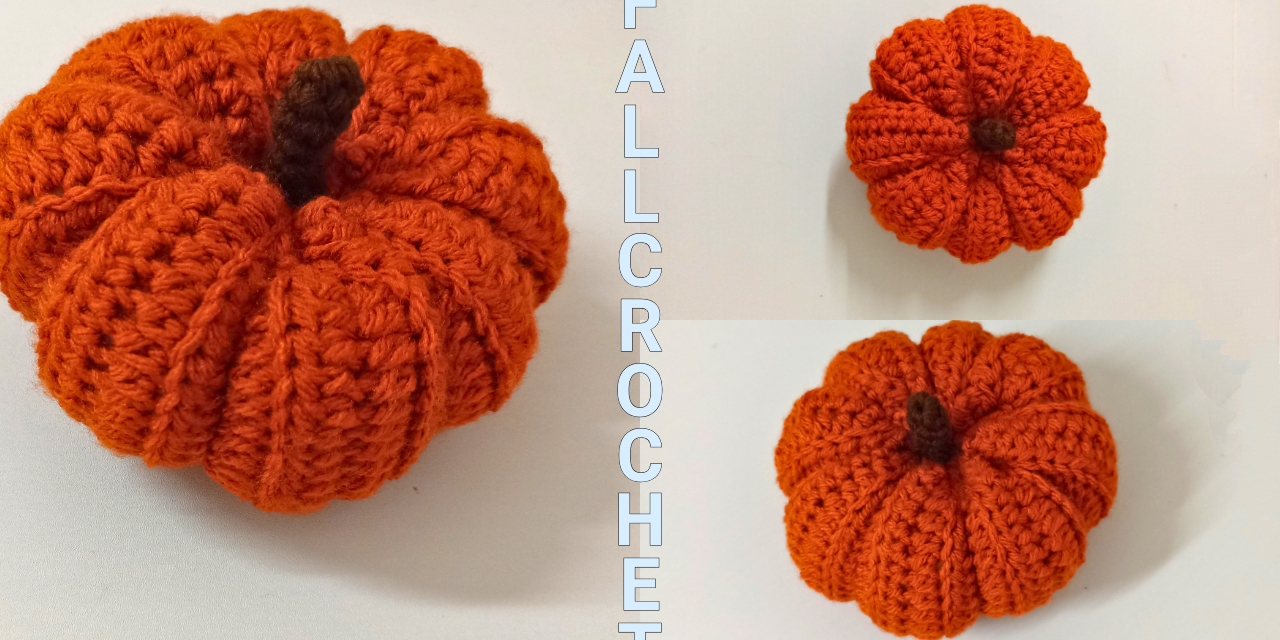
Making a crochet pumpkin is easy. You can find many patterns online but making one that comes out the size you actually pictured is where people get stuck. You follow the pattern and somehow it ends up too small, too big, or lumpy with stuffing poking through.
In this article we are going to share the pattern first, and then the sizing part. Once you understand the sizing, you can make a pumpkin of any size without looking at another pattern. So grab your hook and let’s get started.
What you need
- Yarn: Worsted Yarn – 2 colors, I choose orange for the pumpkin and brown for the stem.
- Hook: 4.5mm, my yarn calls for 5mm but I drop down a size to make the stitches tighter so the filling does not show off.
- Brown or green yarn for the stem (or a cinnamon stick if you want a real one)
- Fiberfill stuffing
- Yarn needle
- Scissors
Abbreviations
All the terms in this pattern are US crochet terms.
- ch: chain
- sl st: slip stitch
- sc: single crochet
- hdc: half double crochet
- st / sts: stitch / stitches
- MR: magic ring
- rep: repeat
The pumpkin body
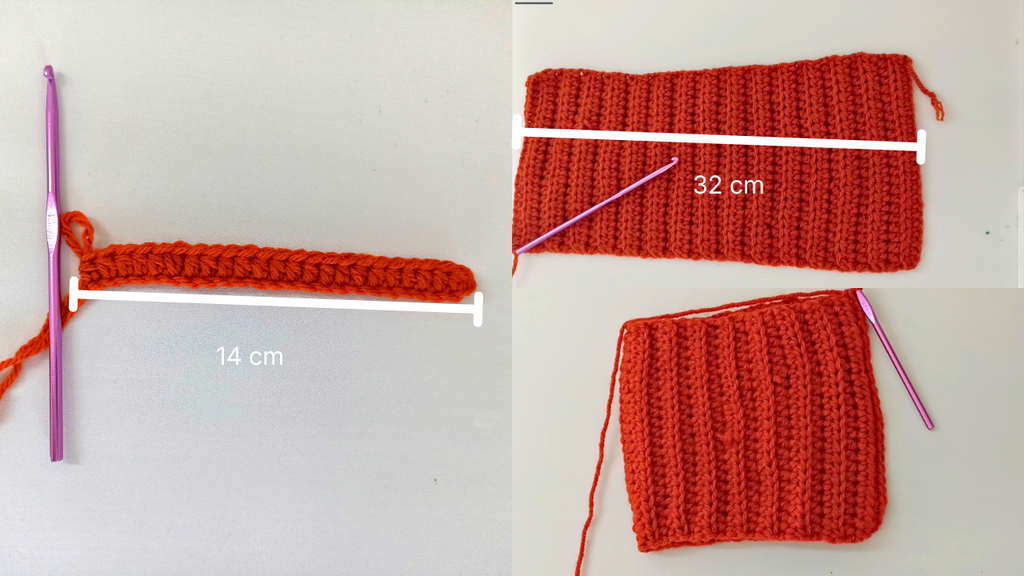
The body is just a flat rectangle, so there is no shaping and nothing to count in the round.
Foundation chain: Chain 24. Mine measured almost 14 cm (about 5.5 inches). That chain length is the height of your pumpkin, so keep it in mind.
Row 1: Half double crochet in the 2nd chain from the hook and in every chain across. Turn.
Row 2 onward: Chain 1, then half double crochet in the back loop in each stitch across. Turn, Note that hdc in blo gives it a special ridge look, while you can work any stitch, I RECOMMEND sticking to the hdc in blo.
Keep repeating that row. You’re going to keep going until the rectangle is at least twice as long as your chain was wide (in general 2-2.5x the foundation row is recommended, I would measure the foundation row not chain because the chains can be stretchy and might produce wrong numbers). I did about 31 rows, and the 32th was the joining one. If you end up with 29 or 30, that’s fine. Your tension and yarn will decide, and it won’t ruin anything.
The last row is your seam row. Don’t just fold it over. Bring the two short ends together, and join the last row to the foundation chain with a slip stitch or a whip stitch. Now you have a tube.
Closing the top and bottom
Look at the open edges of your tube. Because we used half double crochet, each edge has a little ridge of V’s along it.
Work one single crochet into each of those V’s all the way around the opening. Do it on both ends, one end at a time.
When you finish the round on the first end, cut your yarn long, a good 30 cm or more. Thread it on your needle and pass it through each of those single crochet stitches, the same way you’d close up a hat or an amigurumi piece. Pull tight and the end closes like a drawstring bag. Tie it off. Just if you’re making a big size you might want to do more sc rounds, the first would be closer than what we are doing here, instead of aiming for the ridges, you might wanna sc in every other row, so when you pull it tight, it will not result in any major gaps.
Now stuff the pumpkin before you close the other end. Fill it, repeat the single crochet round on the open end, thread the yarn through, pull it tight, and secure it, if you choose to use a cinnamon stick, put it inside the filling on the top side before closing.
Making the pumpkin sections
Right now you have a round ball. What makes it look like a pumpkin is the segmented ridges.
Cut a long piece of yarn, thread it on your needle, and bring it up through the bottom center and out the top center. Wrap it around the outside and go back through the bottom, so the yarn runs down the outside of the pumpkin like a seam line. Pull it fairly snug so it dents the surface. Repeat until you have 8 sections.
With 32 rows, that’s one section every 4 rows. That’s why I like 32. If your rectangle is a few rows short or long, don’t stress about it. Just space the lines evenly by eye.
The stem
You can use a cinnamon stick, and it looks great. I made mine with yarn:
- Make a magic ring.
- Work 5 single crochet into the ring and pull the ring tight.
- Now just keep going around with single crochet in each stitch. No increases. It will form a little tube.
- I did 6 rounds. Stop when it’s as tall as you want your stem.
- Cut the yarn and leave a long tail.
Use that tail to sew the stem onto the top of the pumpkin. Push the needle through to the inside and secure it there so you don’t see the knot.
Now the sizing part
This is the main thing to take from the article.
The rule: the length of your finished rectangle should be about double the width of your foundation chain, or up to 2.5 times if you want a rounder, fatter pumpkin. The length of the rectangle becomes the circumference of the pumpkin. The chain becomes the height.
So with my chain of about 14 cm:
- Double = about 28 cm around
- 2.5 times = about 35 cm around
Same chain, but you can get a flatter pumpkin or a plumper one just by changing how many rows you make.
Measure the piece as you go instead of only counting rows. Your tension isn’t mine. Lay your work flat, don’t stretch it, and measure the length against your foundation row.
Making a different size
Change two things: the foundation chain and the number of rows. Keep the proportions the same.
Based on my 24 chain and about 31 rows, here is roughly what you’d get:
| Foundation chain | Chain width | Rows needed (about) | Circumference |
|---|---|---|---|
| 12 | ~7 cm (2.75 in) | ~16 | 14–17 cm |
| 18 | ~10.5 cm (4 in) | ~23 | 21–26 cm |
| 24 | ~14 cm (5.5 in) | ~31 | 28–35 cm |
| 36 | ~21 cm (8.25 in) | ~46 | 42–52 cm |
Treat the row numbers as a starting point, not a promise. Use them to get close, then check with a tape measure.
One tip for the sections: if your row count is a multiple of 4, you get 8 sections easily. For small pumpkins, 6 sections look better, so aim for a multiple of 3 rows per section.
Yarn weight changes things too. Chunky yarn with a big hook gives you a giant pumpkin from the same stitch count. Thin yarn gives you a tiny one. The pattern stays the same, so you can use whatever’s in your stash.
How to keep the stuffing from showing
This is the most common complaint with crochet pumpkins, and it’s easy to fix.
Go down a hook size. If the yarn label says 5 mm, use 4 mm or even 3.5 mm. Smaller hooks make tighter stitches, and tighter stitches leave smaller gaps for the white stuffing to peek through. It’s the single biggest fix. If your pumpkin comes out smaller than you wanted, add a few rows or chain a bit more.
Don’t overstuff. Tight, overfilled stitches stretch open and the filling shows. Fill it firm but not hard.
Use matching or darker stuffing if you can. If you only have white, put a layer of orange or dark fabric or an old shirt scrap inside first, or stuff a thin lining around the outside before the fiberfill.
Check the stitches in daylight. If you can see through the work when you hold it up to the light, go down another hook size.
Quick tips
- Block your rectangle flat before sewing it up if it curls. It makes the seam much neater.
- Leave long tails everywhere. You’ll use them for closing, sectioning and the stem.
- Make a few different sizes and group them. A set of three looks way better than one.
- Use real cinnamon sticks as stems if the pumpkins are just for decoration. They smell great.
- Try different colors. Orange is classic, but cream, mustard and dusty pink pumpkins look amazing.
The pattern is simple: chain, half double crochet rows until the piece is double the chain’s width (or a bit more), seam, close, stuff, section, add a stem. The sizing rule is what lets you make the pumpkin any size you like. If you want one that doesn’t show its stuffing, use a smaller hook than you normally would.