Share This Pattern :
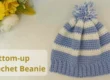
If you have been looking for a crochet hat pattern that is both stylish and surprisingly quick to make, this granny stitch bucket hat is exactly what you need. Granny stitch gives it a classic beautiful textured, and because the whole hat is built from clusters and chain spaces, it works up much faster than you would expect.
In this post I will walk you through every section: how to build the granny-style crown, how to work the straight body down the sides, and how to finish with a structured flare brim and a polished reverse single crochet edge. It is beginner-friendly once you are comfortable working in granny clusters, so without further ado, grab your hook and let’s get started!
Materials You Will Need
- Medium weight yarn (size 4 / worsted) – 3 colors (optional)
- 4.5mm – 5mm crochet hook (use 4.5mm for a tighter fabric, 5mm for a more relaxed open drape)
- Scissors
Skill Level: Beginner–Intermediate (comfortable working in clusters and rounds)
Finished Dimensions
- Crown diameter: approximately 15 cm after Round 6
- Finished circumference: approximately 54–56 cm (adult medium)
💡 Gauge note: Because this hat is worked in open granny clusters, exact stitch gauge matters less than the crown diameter. After Round 6, lay your crown flat, it should measure approximately 15 cm across. If it is smaller, go up half a hook size. If it is larger, go down half a size.
Abbreviations Used (US Terms)
| Abbreviation | Meaning |
|---|---|
| MR | Magic Ring |
| ch | Chain |
| sl st | Slip Stitch |
| dc | Double Crochet |
| inc | Increase – 2 clusters worked in the same space |
| st(s) | Stitch(es) |
📌 Note: Throughout this pattern, ch 3 counts as 1 double crochet. Each cluster = 3 dc worked together into the same space and ch1 .
Pattern Notes
- This hat is worked in joined rounds from the top of the crown down to the brim. Join each round with a slip stitch unless otherwise noted.
- All rounds begin with a slip stitch into the next chain-1 space to position your hook correctly before starting the cluster.
- Stitch counts refer to the number of clusters per round, not individual stitches.
- The crown section (Rounds 1–6) expands the flat circle through increases. The body section (Rounds 7–13) works straight down with no increases to form the sides.
Pattern Instructions
Part 1: Crown
Round 1: MR, ch 3 (counts as 1 dc), 2 dc into ring, ch 1, repeat 3 more times. Join with sl st to top of ch 3. (4 clusters, 4 chain-1 spaces)
Round 2: Sl st across the 2 dc and into the ch-1 space. In that same space work ch 3, 2 dc, ch 1, 3 dc.
In next ch-1 space work 3 dc, ch 1, 3 dc; repeat around. Join. (8 clusters, 8 chain-1 spaces)
💡 Round 2 doubles your cluster count by working 2 clusters into every space from the previous round.
Round 3: Sl st to next ch-1 space. In corner spaces (the spaces between each pair of clusters from Round 2) work 3 dc, ch 1, 3 dc. In side spaces work 3 dc, ch 1. Repeat around. Join. (12 clusters)
Rounds 4–6: Repeat Round 3, continuing to work corner increases at each existing corner and single clusters in side spaces. Join each round.
After Round 6, your crown should measure approximately 15 cm in diameter laid flat.
Part 2: Body (No Increases)
Now you work straight down to form the sides of the hat. No increases are added here – you simply work one cluster into every chain-1 space all the way around.
Rounds 7–13: Sl st to next ch-1 space. Work 3 dc, ch 1 in each ch-1 space around. Join.
Repeat for 7 rounds total. This creates the structured tube that sits on your head.
💡 If you prefer a taller hat or want a deeper fit, simply add extra rounds here before moving to the brim. Each round adds approximately 1 cm of height.
Part 3: Brim
The brim flares outward by doubling the clusters in each space on Round 14, then working normally for two more rounds to build width.
Round 14: Sl st to next ch-1 space. Work (3 dc, ch 1) twice in every ch-1 space around. Join.
This is your increase round – you are working 2 full clusters into each space, which causes the fabric to flare outward and creates the classic bucket hat brim shape.
Round 15: Sl st to next ch-1 space. Work 3 dc, ch 1 in each ch-1 space around. Join.
Round 16: Repeat Round 15.
Edge Finishing
Work a reverse single crochet (also called crab stitch) in each stitch around the outer edge of the brim. This gives a neat, firm, slightly twisted edge that keeps the brim from curling.
Fasten off and weave in all ends securely.
If you’re still confused, or would like a different brim style, you can watch my full tutorial, it will walk you through the same crown and sides but different brim style
Tips and Customization
- 3-tone version: Switch to a contrasting color at Round 14 (where the brim begins) for a fun pop of color. and make the edge with another color, you can add more fun at the body start/ crown finish.
- Tighter or more structured hat: Use a 4mm hook with the same medium weight yarn for a denser, more structured fabric that holds its shape really well.
- Larger or smaller size: Add or remove rounds in the Body section (Part 2) to adjust the depth of the hat. The crown diameter controls the circumference, so if the fit feels off, adjust your hook size first.
- Yarn choice: Cotton or cotton-blend yarns are beautiful for a summer version of this hat and show off the open granny texture perfectly. A wool or acrylic blend is cosier for cooler weather and gives a slightly drapier look.
- Blocking: If your brim is curling up, block the finished hat by dampening it lightly and shaping it over a bowl the size of your head. Allow to air dry completely for a crisp, structured finish.
I would love to see your finished granny stitch bucket hat! Share it with us on Instagram @sinarra1 or join our Facebook group and show us your color choices.
Follow us for more free patterns:
📍 Shop new patterns: https://sinarracrochet.gumroad.com
© 2026 Sinarra. For personal use only. You may sell finished items with credit to Sinarra at crewchet.com. Do not reproduce or resell this pattern without written permission.
Happy crocheting! 🧶