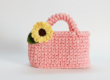
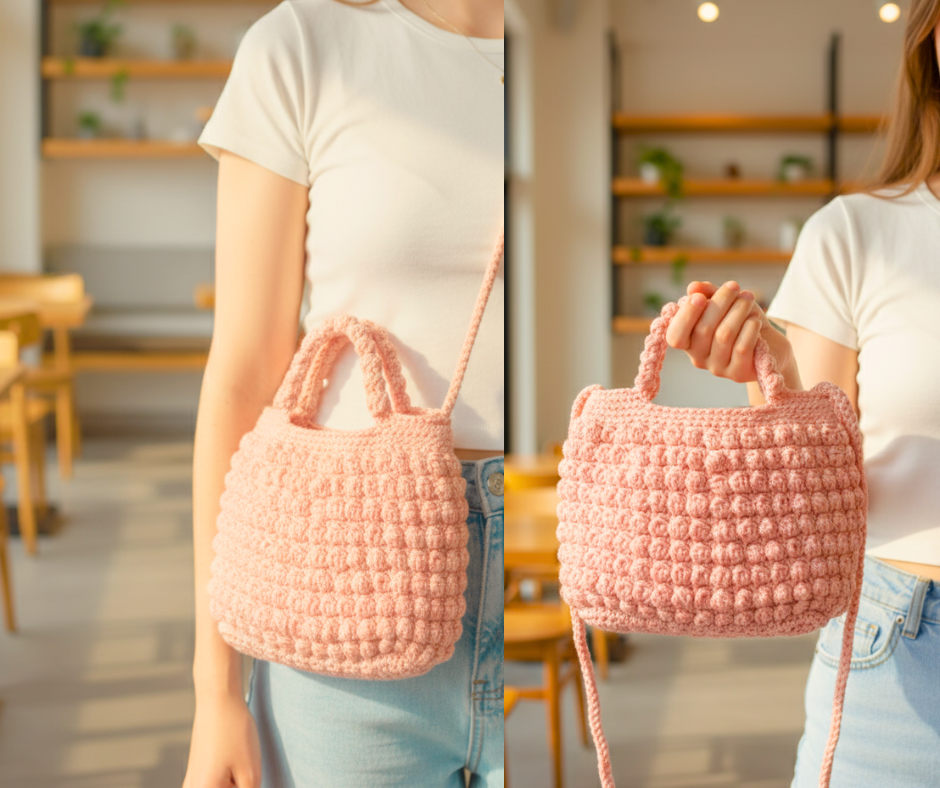
Crochet your new Bobble Stitch Bag. It’s perfect for you because it combines a trendy texture with practical style.
The bag features both a crossbody and a hand strap.
This pattern is designed to be beginner-friendly, using basic stitches with a fun bobble twist to create a unique fabric. It is worked as one piece in rounds, making it super easy and adjustable .
We’ve included a full video tutorial, a written pattern, and all the resources you need to succeed.
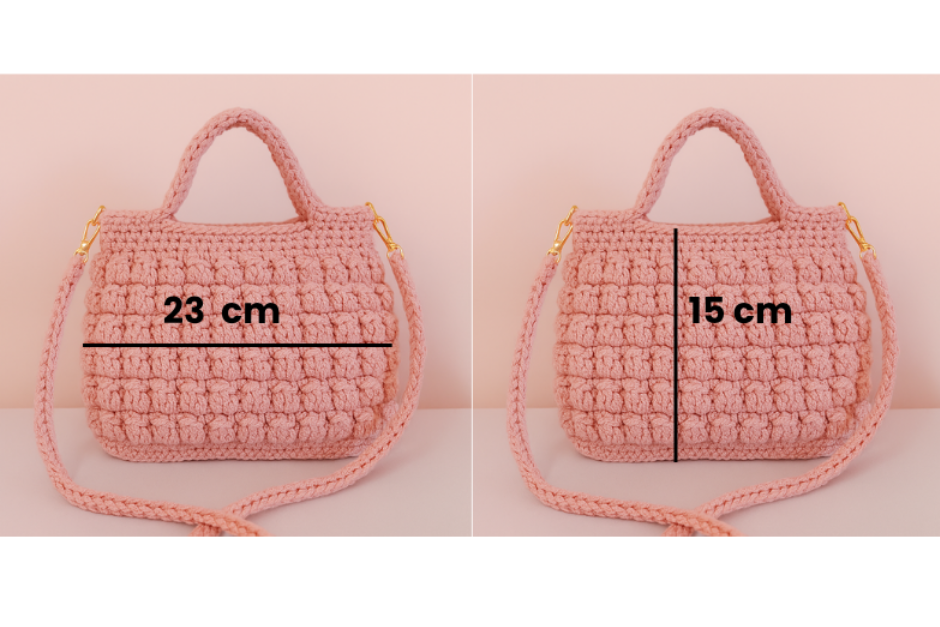
Finished Bag Dimensions:
- Width: approx. 23 cm (9 inches).
- Height: approx. 15 cm (6 inches)
- Base Width: approx. 8 cm (3 inches)
🧶 Materials & Tools
- Yarn: 2 mm polyester cord.
- Crochet Hook: 4 mm.
- Other:
- Scissors
- Yarn Needle
- Stitch Markers (optional but helpful)
- Bag Magnetic Snap Button (for closure)
🔗 Get everything you need easily! If you’re new to crochet, this Beginner Crochet Kit (Affiliate Link) has all the essential hooks, needles, and tools to get you started.
If you are completely new to crochet, here is our comprehensive guide for beginners.
🧾 Abbreviations (US Terms)
- ch: chain
- st: stitch
- sc: single crochet
- slst: slip stitch
- inc: increase (2 sc in the same st)
- dec: decrease (sc 2 stitches together)
- hdc: half double crochet
- yo: yarn over
- blo: back loop only
📖 Written Crochet Pattern
The Bag Base
- start with a slip knot and chain (ch) 25. for a larger bag add more chains.
- Row 1: Make a single crochet (sc) in the 2nd chain from the hook. Sc in each chain across. Chain 1 and turn. (24 sts)
- Rows 2-10: Sc in each stitch across. Chain 1 and turn at the end of each row.
Pro Tip: For a wider base, simply add more rows to the base at this stage.
The Bag Body
- Now, we’ll work around the entire rectangular base. Chain 1, then work one round of single crochet (sc) along all four sides of the base.
- When you reach the last stitch of the round, skip it. Then, join with a slip stitch (slst) to the first sc of the round.
- Work one more complete round of sc.
- Chain 1, make one round of slip stitches (slst), followed by another round of sc. This creates a neat foundation for the bobble stitches.
The Bobble Stitch Pattern
- Bobble Stitch Round: In this round, you will alternate stitches.
- Sc in the first st.
- In the next st, work 3 unfinished hdc. (yarn over, insert hook, yarn over and pull up a loop — you will have 2 loops on the hook. Repeat twice more in the same stitch until you have 4 loops on the hook). Yarn over and pull through all 4 loops. This is your bobble stitch.
- Repeat [sc in next st, bobble in next st] all around.
- Next Round: Sc in each stitch around.
- Repeat the sequence of 1 bobble stitch round followed by 1 sc round a total of 9 times.
- Finish the body with 2 rounds of sc worked in the back loop only (blo). This creates a clean ridge.
Creating the Handle
- Fold the bag in half. On both the front and back panels, count 10 stitches from each end and mark them with stitch markers. This section between the markers is where the handle will attach.
- Starting from one side, work sc in the blo until you reach the first marker.
- Remove the marker, sc in that same stitch, then chain 25 to form the handle loop.
- Skip till reaching the marked stitches on the other side and join the chain with a sc.
- Continue working sc in the blo to finish the round.
- Repeat the same steps for the back panel so you have two handle loops.
- In the next round, work sc in the blo until you reach the handle area. Across the 25 chain stitches of the handle, you can either:
- Work bobble stitches for a textured handle, or
- Work single crochets for a smoother, more comfortable handle.
Finishing Touches
- Weave in all loose ends with your yarn needle.
- Sew the magnetic snap button inside the bag for a secure closure.
- To make it a crossbody bag, attach a strap! You can use a pre-made leather, chain, or fabric strap by sewing it to the inside of the bag body.
💡 Helpful Tips for Beginners
If you’re new to crochet, don’t be intimidated by the bobble stitch! The video tutorial is your best friend. Here are a few tips:
- Practice the Bobble: Make a small swatch to practice the bobble stitch before starting the bag.
- Consistent Tension: Try to keep your yarn tension even for uniform-looking bobbles.
- Using Stitch Markers: They are essential for marking the beginning of rounds and the handle placement.
Need to learn the very basics? Check out our comprehensive guide: How to Start Crocheting: A Complete Guide for Absolute Beginners.
📺 Full Video Tutorial
Prefer to follow along with a video? Watch our step-by-step guide for the entire bag, including the body and handle.
written pattern :
If you like to keep the pattern and have access to life long update , you can purchase it through our websites :
We hope you love making this adorable bobble stitch bag! If you have any questions, feel free to reach out to us on Facebook or Instagram.
Happy Crocheting!