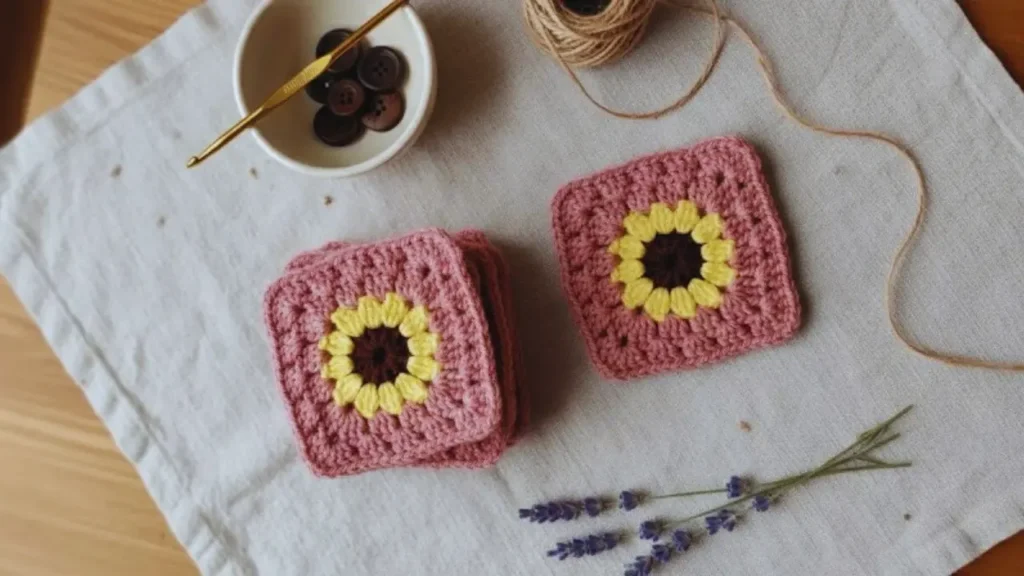
This sunflower granny square pattern is so easy and beginner friendly.
if you know how to make a magic ring and a double crochet, then you’re good to go.
our pattern includes a sunflower and 2 borders, making it super adjustable for different projects.
The finished square is 11 x 11 cm approximately, but it’s highly dependent on your yarn weight and tension.
You can make add or remove as many borders as you like, it all follows the same pattern. The used colors are optional as well, you can customize it as you like but I would recommend you to stick to the yellow and brown to give it the unique sunflower look since it is a sunflower granny square.
without further ado, let’s just dive in.
Materials
Yarn: Worsted Weight (Medium) is typically recommended for this project, but any weight yarn will work. if you are using it for a table runner or any project that handles heat, switch to cotton.
Crochet Hook: 4.0 mm hook, or use the size recommended on your yarn label.
Tapestry Needle: Used for weaving in all loose yarn ends.
Scissors: For cutting yarn.
Stitch Markers (Optional): Helpful for marking the start of a round or corner spaces.
Abbreviations (US terms)
All our patterns use US terminology, so please if you are not familiar with them, keep a guide next to you to get the right pattern and prevent confusion.
MR: Magic ring
ch: chain
sl st: Slip Stitch
sc: Single Crochet
dc: Double Crochet
Making the sunflower

We start our pattern by making a magic ring, make a traditional MR rather than chains joined together, this will close the circle tight and give the flower a better appearance.
Then, we make 12 double crochets inside the ring.
This is shown in image above, number one and two.
then slst to the first dc, cut the yarn off.
Insert your hook in any stitch, attach the yellow yarn and ch3.
This will count as a dc. In the same stitch, add 2 more double crochet, then chain 2.
Repeat the same process (3dc, ch2) for the next 11 st.
slst to first dc we made.
Making the first Border

In the spaces between the sunflower petals, attach your new yarn, choose the color you want, look closely to the image above, the new yarn color goes between the 3dc cluster in the ch2 spaces.
ch3 counts as the first dc, add 2 dc in the same st.
Add 3 dc in the next stitch.
Now we have our first side. The next st will be our corner.
For the corner, make (3dc, ch2, 3dc) all in the same stitch.
Repeat, one side (2 stiches, in each one 3dc), then one corner (3dc, ch2, 3dc).
Since this is a square, you will have 4 sides, and 4 corners.
You can end here, and you’ll have a totally functional sunflower granny square. if you want to add the second border then lets add it together.
Making the second border

To add a second border, we follow the same pattern. We will have 3 stitches a side, then a corner. you can add as many borders as you want, they all follo the same concept, but the sides will have more spaces and of course the same four corners for each border.
ch3 counts as dc, 2dc in the same st.
Repeat for the next 2 stitches.
Then make a corner (3dc, ch2c 3dc).
Repeat the same to get 4 sides and 4 corners in total.
As we mentioned, this is a really trendy and good design to experiment with and try multiple designs, you could join as many squares as you want and make literally anything you desire, these designs could include bags, winter cardigans, even if using a light weight yarn a summer cardigans as well, a makeup pouch, I even made a beanie with only 8 of them and it fit me an adult with head circumference of 53 cm very well, all I did it making a flat panel of 2 layers, each have 4 squares and join them on top and add few sc rows at the bottom, joined the sides and I had the best looking beanie that winter.
Happy crocheting!
if you did not fully get any of the details above, here is a full video tutorial.
3 comments