Share This Pattern :
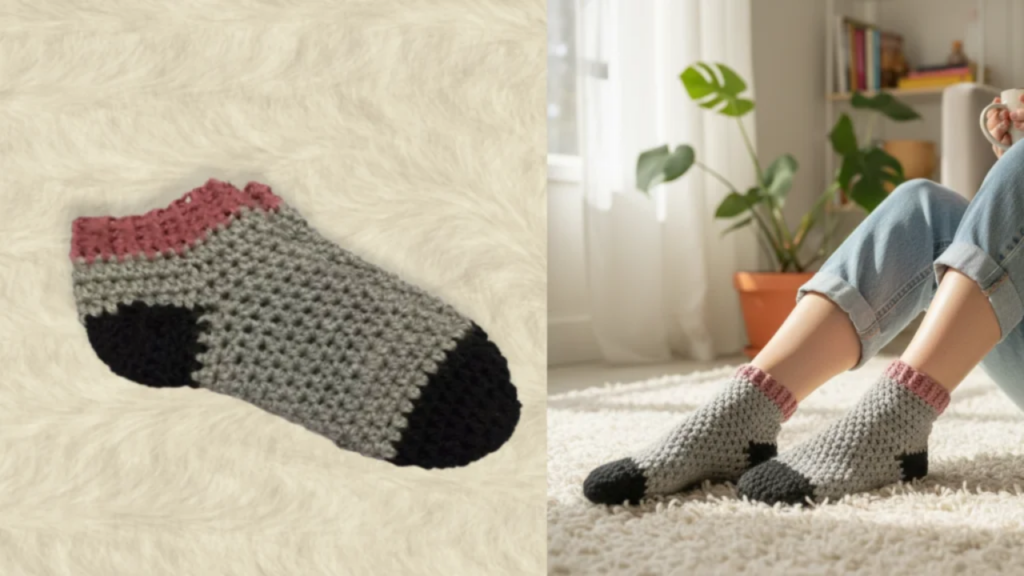
Looking for a simple crochet sock pattern that actually works? This beginner-friendly toe-up crochet socks design creates comfortable, custom-fitted socks perfect for keeping your feet warm all year round.
I made it for myself so the I had the opportunity to keep checking the size and fit as I go, if you are making those pairs for yourself follow as I did but if not just ask for the detailed measurements as we will explain in this pattern below.
Materials Needed for Crochet Socks
Yarn Requirements:
- Medium weight yarn (Category 4)
- Blend: 49% acrylic, 51% wool
- 3 contrasting colors (toe color, body color, and cuff color)
Skill Level: Beginner to Intermediate
Time to Complete: 1 hour per sock maximum
Perfect For: House socks, gifts, cold weather wear
Hook Size:
- 5mm (H/8) crochet hook
Additional Supplies:
- Yarn needle for weaving in ends
- Scissors
- Stitch markers (optional but helpful)
Crochet Abbreviations (US terms)
Understanding these common crochet terms will help you follow the pattern smoothly:
- MR – Magic Ring
- hdc – half double crochet
- inc – increase (2 hdc in same stitch)
- slst – slip stitch
- fphdc – front post half double crochet
- bphdc – back post half double crochet
Step-by-Step Crochet Sock Pattern
Part 1: Creating the Toe Cap
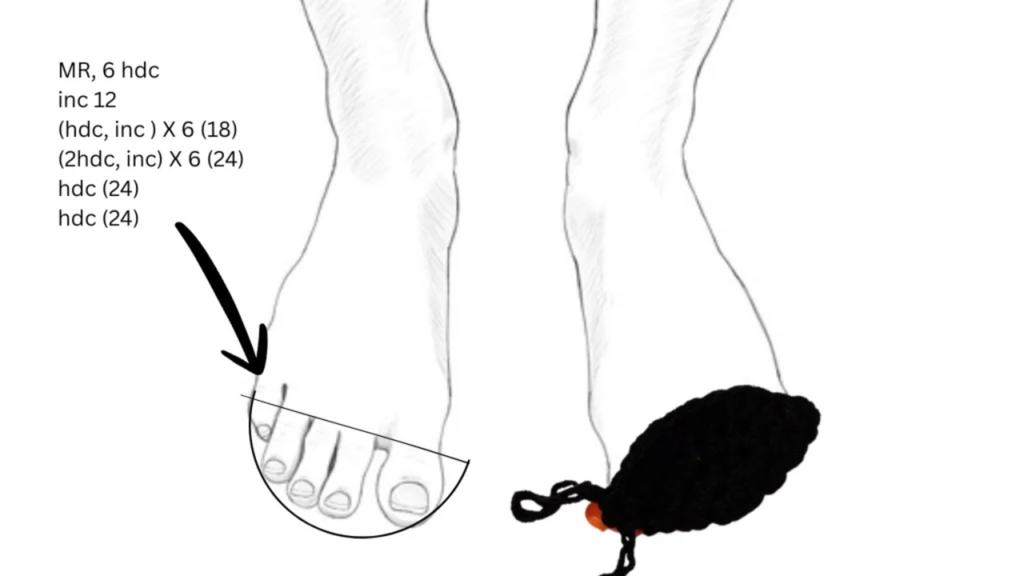
The toe begins with a magic ring technique, which creates a seamless, comfortable fit at the tip of your sock, the more stitches in the MR, The wider the expansion later so I would recommend you to stick to 6 st for small adult feet and 8 for larger ones.
Round 1: Start with MR, work 6 hdc into the ring. Pull tight to close. (6)
Round 2: Work inc in each stitch around. (12)
Round 3: 1 hdc, inc repeat around. (18)
Round 4: 2 hdc, inc repeat around. (24)
The toe cap should now barely cover your toes, creating a comfortable foundation for the rest of the sock.
Rounds 5-6: Work 2 rounds of hdc evenly around with no increases. (24) – same color as the cap. try it out and make sure it covers all the toes and set as a cap comfortably.
Part 2: Building the Foot Section
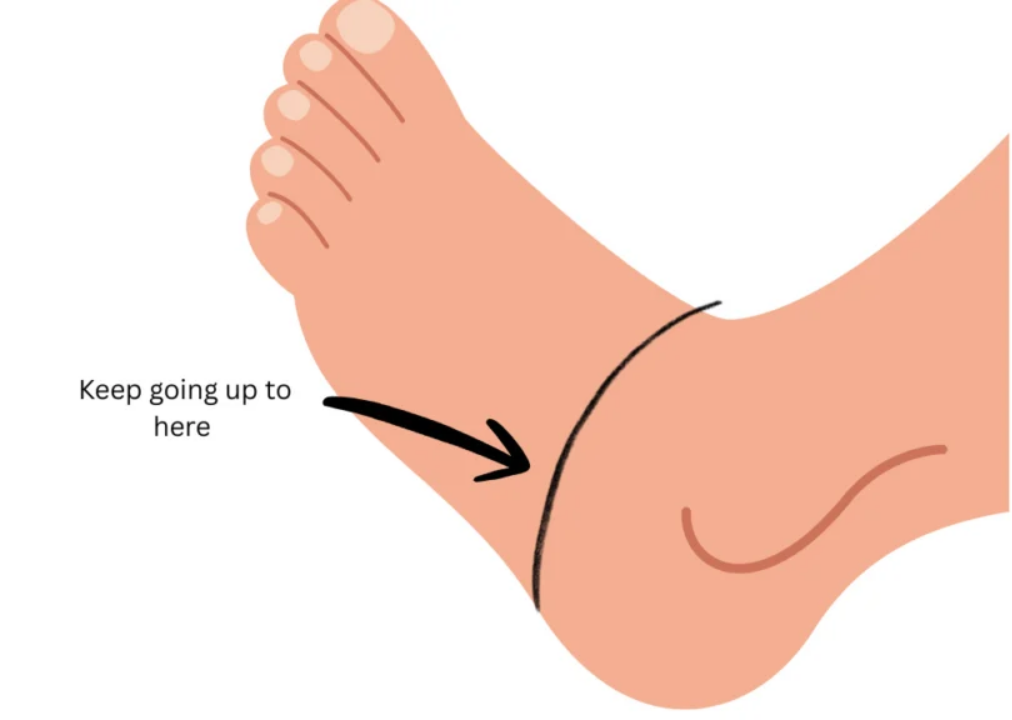
This is where your sock begins to take shape along the length of your foot, change the color (optional) to give the socks a pretty design, choose a close color to the toe one, I choose black for the toes and grey for the body of the socks, but you can work it all with a single color.
Rounds 7-18: Continue working hdc evenly around for approximately 12 rounds, or until you reach just before the ankle bone. The exact number of rounds will depend on your foot length.
Tip: Try on your sock as you go to ensure the perfect fit. The sock should reach the base of your ankle before starting the heel construction.
Part 3: Constructing the Heel Flap
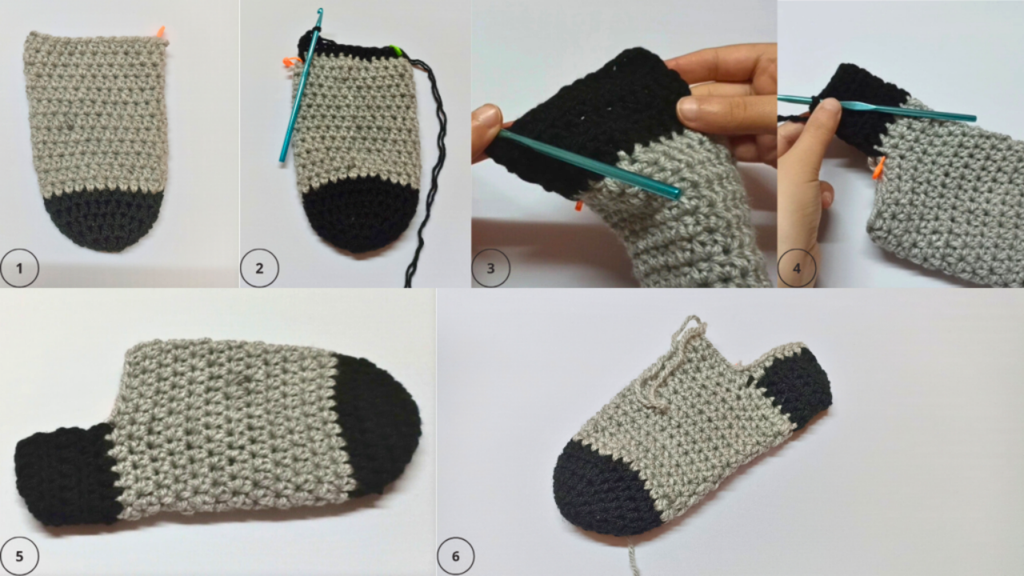
Working with the toe color (or your chosen heel color), you’ll now work back and forth in rows instead of rounds.
- Work across half of your stitches (12 stitches, those were mine, your stitches count could be different, the important part is halving your total count)
- Chain 1, turn
- Work 5 rows of hdc, working only on these stitches
- After completing rows, use slip stitches to join the heel flap to the other side of the opening
This creates a structured heel pocket that cups your heel comfortably.
Part 4: Creating the Sock Leg
Now you’ll return to working in rounds to build the leg of the sock.
Changing to Body Color: Join your main body color at the back of the heel.
Continue working hdc rounds until the sock reaches your desired height, I prefer short for this design, you could go as high as you want, just follow he same logic.
Part 5: Adding the Ribbed Cuff
The ribbed cuff provides stretch and helps keep your socks up without being too tight.
Changing to Cuff Color: Join your third color for the ribbing section.
Ribbing Pattern: Work alternating fphdc, bphdc around for 8-10 rounds. This creates a stretchy 1×1 ribbing that looks professional and functions beautifully.
To work front post half double crochet (fphdc): Yarn over, insert hook from front to back pull the yarn to the front again around the post (body) of the stitch , complete hdc as normal.
To work back post half double crochet (bphdc): Yarn over, insert hook from back to front to back again around the post of the stitch , complete hdc as normal.
Finishing Your Crochet Socks
- Fasten off your yarn, leaving a tail
- Weave in all yarn ends securely using a yarn needle
- Block your socks if desired for a more polished finish
- Make a second sock to complete the pair!
Tips for Perfect Crochet Socks
Sizing Adjustments:
- For larger feet: Add more increases in the toe section (work additional increase rounds)
- For smaller feet: Skip one increase round in the toe section
- For longer feet: Add more rounds in the foot section before starting the heel
Yarn Selection: The acrylic-wool blend specified in this pattern provides the perfect balance of durability and comfort. The acrylic adds strength and washability, while the wool provides warmth and volume.
Color Combinations: Three-color designs create visual interest. Consider these combinations:
- Classic: Black toe, gray body, charcoal cuff
- Bright: Teal toe, navy body, teal cuff
- Neutral: Cream toe, beige body, brown cuff
- Bold: Red toe, black body, red cuff
Washing Instructions: Despite the wool content, the acrylic blend makes these socks machine washable. Wash on gentle cycle in cool water and lay flat to dry for best results.
Pattern Customization
This basic crochet sock pattern is incredibly versatile. Once you’ve mastered the basic construction, try these variations:
- Add stripes by changing colors every few rounds
- Create a Fair Isle effect by working color changes within rounds
- Adjust the cuff height for knee-high socks
- Add decorative stitch patterns to the leg section
Here is the full video tutorial
This easy crochet sock pattern is perfect for beginners ready to move beyond simple projects while still accessible enough not to feel overwhelming. The three-color design adds visual interest without complicated colorwork, and the toe-up construction ensures a comfortable, custom fit every time.
Whether you’re making cozy house socks for yourself or creating thoughtful handmade gifts, this pattern will become a favorite in your crochet repertoire.
Happy crocheting!