Share This Pattern :
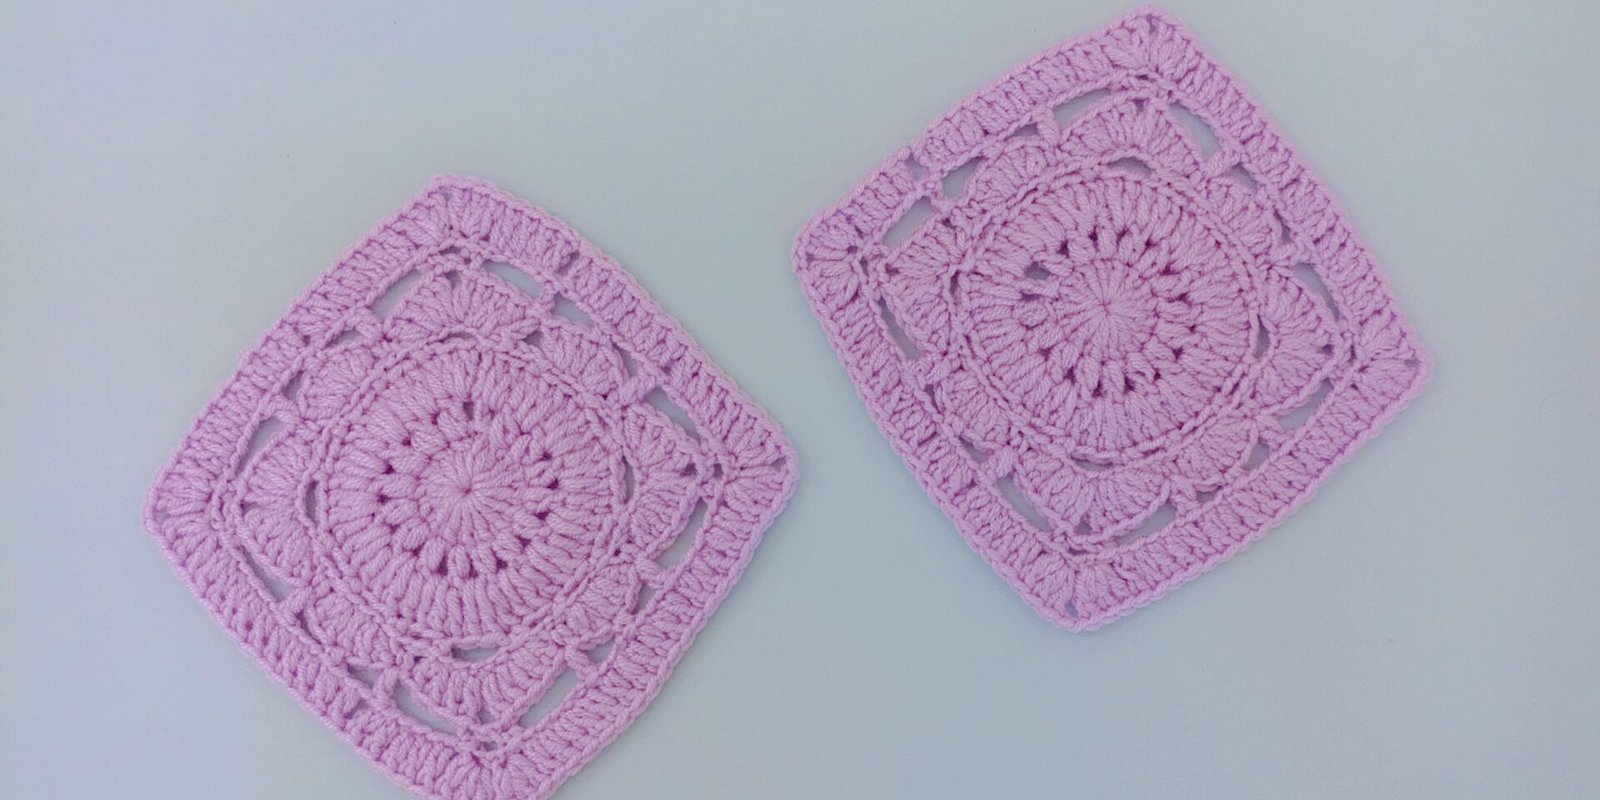
Crochet squares do not need to be boring, and this Mandala one is a proof, it features a beautiful circular mandala center to a classic granny square frame? It’s pretty and functional. It is Perfect for blankets, pillow covers, or bag panels, I already made 2 perfect and unique projects with them and will take a look down below, so without further ado, grab your hook and let’s get started!
Materials Needed
- Light weight cotton yarn a color of your choice (weight is optional too)
- Crochet hook 3.0 mm
- Scissors
Abbreviations Used
- MR = Magic Ring
- ch = chain
- slst = slip stitch
- sc = single crochet
- dc = double crochet
- sp = space
- rep = repeat
- FO = fasten off
Pattern Instructions
For the first round, make a MR, ch 3 (counts as first dc), then work 15 dc into the ring, slst to top of ch-3 to join. (16 dc)
Round 2
ch 3 (counts as dc), then dc, ch 1 in each dc around, slst to top of ch-3 to join. (16 dc pairs, 16 ch-1 spaces)
Round 3
ch 3 count as a dc, add another dc in same ch-1 sp, then 1 dc over the dc between the spaces. Rep around, slst to join. (2 dc in each sp, 1 dc over each single dc)
Round 4
This round creates the lacy arches that separate the circle into 4 sections, each with a corner arch and side arches between them.
Work the following sequence 4 times around:
- Ch 5, sc over the next single dc
- Ch 2, sc over the next single dc
- Ch 3, sc over the next single dc
- Ch 2, sc over the next single dc
Slst to join. (4 corner ch-5 arches, with ch-2, ch-3 and ch-2 arches along each side)
Round 5
This round builds the shells along the sides and the corner points.
In each ch-5 corner arch: 2 dc in the first 2 chains, dc in the 3rd chain, ch 3, dc in the same 3rd chain, then 2 dc in the last 2 chains. (corner made – 5 dc with ch-3 point)
After the corner: Sc in the 2nd chain of the next ch-2 sp.
In the ch-3 arch: 2 dc in the first chain, dc in the middle chain, 2 dc in the last chain. (5 dc shell)
Sc in the 1st chain of the next ch-2 sp.
Rep [Corner, sc, Shell, sc] 4 times around, slst to join.
Round 6
This round connects the corners and shells with new arches, setting up the final granny square border.
After each corner (starting from the sc at the top of the ch-3 corner point):
- Ch 3.
- ch 5, then sc into the 1st chain of the ch-3 corner point, ch3, sc into the 3rd ch of the ch3 corner.
- Ch 5, dc over the sc from the previous round (the sc between the corner and the shell)
- Ch 3, sc over the single dc sitting above the half-circle shell
- Ch 3, dc over the sc (the sc on the other side of the shell)
Rep step 2 – 5 around all 4 sides, making sure to work the corner connection and the half-circle arch on each side consistently.
Slst to join.
Round 7
This is the classic granny square round that frames the whole piece into a neat square.
Along each ch-5 arch: Ch 3 (counts as dc), dc in each of the remaining 4 chains of the ch-5. (5 dc)
In each ch-3 point on the corner: 2 dc in the first chain, 1 dc in the middle chain, ch 2, 1 dc in the middle chain again, 2 dc in the last chain. (corner cluster with ch-2 sp)
5 dc over the next ch-5.
2 × (3 dc over the next ch-3).
5 dc over the next ch-5.
Rep around all 4 sides, slst to top of ch-3 to join. FO.
Finishing
Weave in all ends securely. Block by pinning flat and misting with water, or steam block for a perfectly crisp, flat square.
Still not sure about a step? Watch the full video tutorial on our YouTube channel – I walk you through every single round so you can follow along stitch by stitch. Sometimes seeing it in motion makes all the difference!
👉 Watch the Tutorial on YouTube
Fun Ideas For the Mandala Square
Make-up Pouch
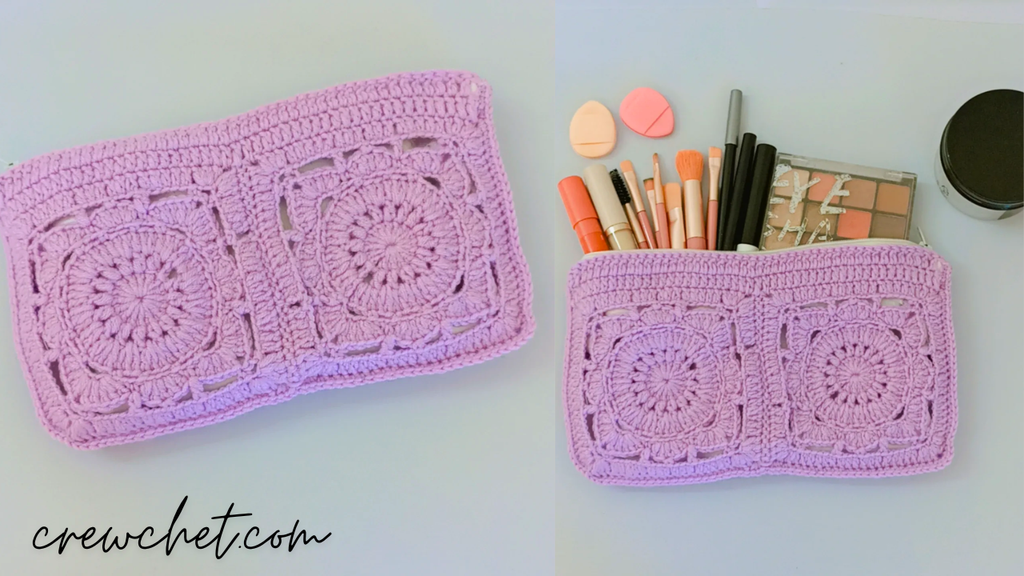
To make this gorgeous make up pouch, make 4 Mandala squares, Join 2 for the front panel and 2 for the back, above each panel crochet 3 rows of sc, hdc or even dc, it is totally optional depending on the height you want, and line it with a suitable material, make sure the color is close to your yarn color and attach a zipper on top, similarly you can add more squares to make a bag, a book cover or even a laptop pouch, the same concept applies.
Phone Pag
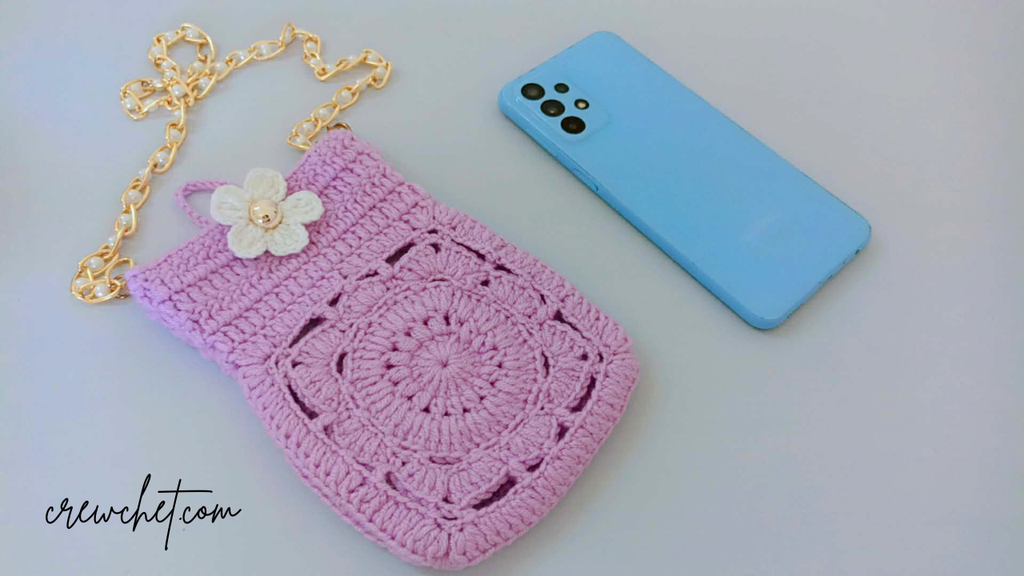
For this unique phone bag, you only need 2 Mandala squares and join them together in your preferred way, once joined from three sides works 3-4 rounds of hdc on top or until you reach the height of your phone, make sure your phone fit comfortably inside, the next step is totally optional but for added esthetic, you can sew a small white flower just as in the image above, alternatively you can use magnetic snap button on the inside of the bag to close it.
once you know how to make the squares, the ideas are literally limitless, and the more you experiment with them, the more creative you can become. You can use different color combination as well, I hope you liked this pattern and all it’s application.
Happy crocheting🧶