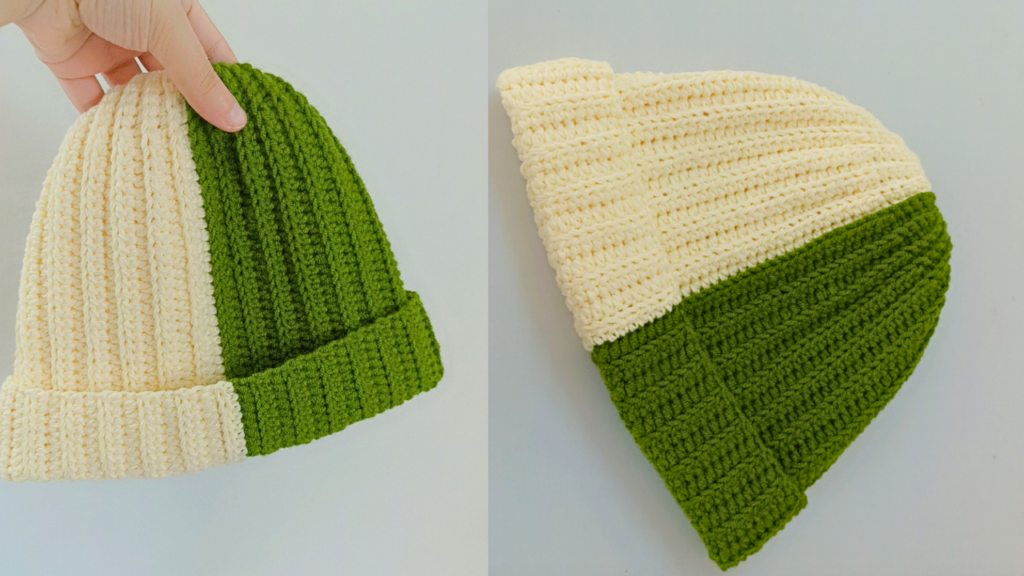
Crochet beanies are super easy, they are also so versatile, you literally can apply the same concept to any stitch or color combination you like, but the main problem often comes with the beanie sizing, often comes as either too tight or too loose, in this article we are going to solve this problem so your next beanie fit perfectly, so without further ado, grab your hook and let’s get started.
Materials
- Acrylic worsted yarn 2 colors (optional)
- 4.00 mm hook
- stitch markers
- scissors
Abbreviation (US terms)
- ch: chain
- sc: single crochet
- hdc: half double crochet
- st: stitch
- R: row
Beanie Pattern
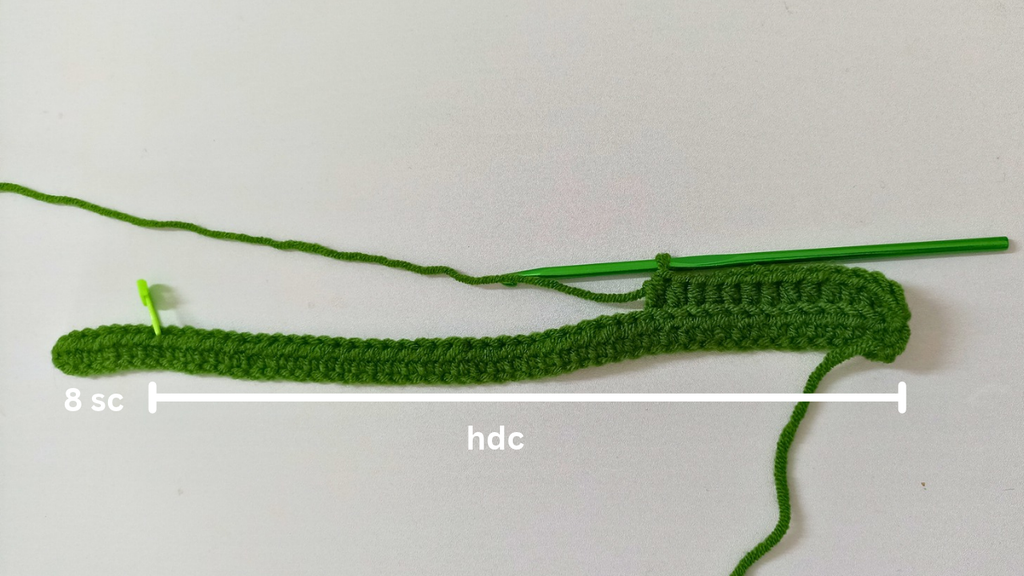
Before I share the sizing guide, I want to share my favorite beanie pattern, which I use for all my beanies projects, all you have to do it make a flat panel and close it off, so let’s see the pattern in further details:
R1: chain 52, this measures around 26 cm (this will be the length of the beanie from the crown to the eye brows + the brim length).
R2: mark the last 8 stitches, then hdc until reaching that marker, in the last 8 st, make 8 sc, ch1 and turn your work.
R3-25 : continue sc over the sc and hdc over the hdc from each previous row until reaching 25 row and here it measures 25 cm as my gauge for each row is 1 cm, that will be half of the beanie circumference because I’m making 2 colors beanie, I will change colors here and insert my second one, continuing to do the same steps until reaching exactly 50 cm, to get 2 matching halves.
Joining The Ends
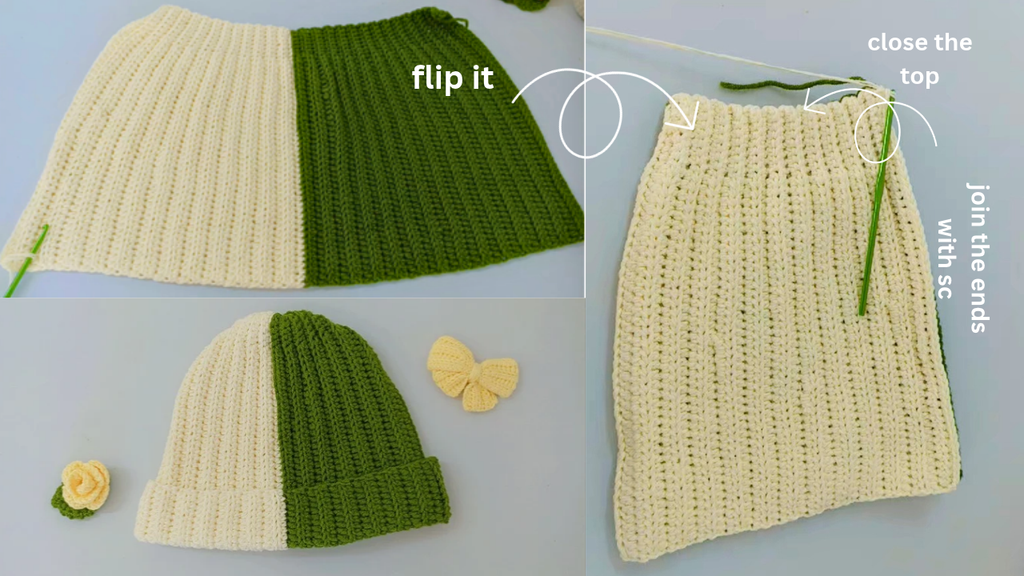
as you can see in the image above, once you are done with your rectangular panel, just fold it, making the wrong side facing you and join with a sc, once done flip the beanie inside out so the right side is facing out, cut the yarn and leave a long tail ti close off the crown and that is it, now you have a perfect beanie.
| Age | Head Circumference | Beanie Circumference (Minimal Stretch Yarn) | Beanie Circumference (Very Stretchy Yarn) | Beanie Height | Height With Folded Brim |
|---|---|---|---|---|---|
| 0-3 months | 33-36 cm (13-14″) | 28-34 cm (11-13.5″) | 23-28 cm (9-11″) | 13-15 cm (5-6″) | 18-22 cm (7-8.5″) |
| 3-6 months | 36-41 cm (14-16″) | 31-39 cm (12-15.5″) | 26-33 cm (10-13″) | 15-16 cm (6-6.5″) | 20-23 cm (8-9″) |
| 6-12 months | 41-46 cm (16-18″) | 36-44 cm (14-17.5″) | 31-38 cm (12-15″) | 16-17 cm (6.5-7″) | 21-24 cm (8-9.5″) |
| 1-3 years | 46-48 cm (18-19″) | 41-46 cm (16-18″) | 36-40 cm (14-15.5″) | 18-19 cm (7-7.5″) | 23-26 cm (9-10″) |
| 3-5 years | 48-50 cm (19-20″) | 43-48 cm (17-19″) | 38-42 cm (15-16.5″) | 19-20 cm (7.5-8″) | 24-27 cm (9.5-10.5″) |
| 5-10 years | 50-52 cm (20-20.5″) | 45-50 cm (17.5-19.5″) | 40-44 cm (15.5-17.5″) | 20-21 cm (8-8.5″) | 25-28 cm (10-11″) |
| Teen / Small Adult | 52-55 cm (20.5-21.5″) | 47-53 cm (18.5-21″) | 42-47 cm (16.5-18.5″) | 20-22 cm (8-8.5″) | 25-29 cm (10-11.5″) |
| Adult Medium | 55-58 cm (21.5-23″) | 50-56 cm (19.5-22″) | 45-50 cm (17.5-19.5″) | 21-23 cm (8-9″) | 26-30 cm (10-12″) |
| Adult Large / XL | 58-61 cm (23-24″) | 53-59 cm (21-23″) | 48-53 cm (19-21″) | 22-24 cm (8.5-9.5″) | 27-31 cm (10.5-12″) |
💡 Quick Tip: These measurements are averages. Always measure the recipient’s head when possible for the most accurate fit.
How to Measure for a Crochet Hat
Measuring Head Circumference
- Use a soft measuring tape and wrap it around the widest part of the head
- Position it about 1 cm above the eyebrows and ears
- Keep it level all the way around
- Note the measurement where the tape overlaps
Measuring Hat Height
For a fitted beanie (no fold):
- Measure from the crown of the head to just above the eyebrows
- This creates a beanie that sits close to the head
For a slouchy or folded brim beanie:
- Add 5–7 cm to the fitted height
- This gives you extra length to fold up or create a slouch
Tips for Perfect-Fitting Beanies
This is important so I’m going to stress on it:
1. Consider Yarn Stretch
- High stretch (ribbing, acrylic): Use the smaller measurement
- Low stretch (cotton, tight stitches): Use the larger measurement or add 1-2 cm
- Example: An adult with 56 cm head circumference might need a 50 cm beanie in stretchy ribbed acrylic, but a 54 cm beanie in non-stretchy cotton
2. Test Your Gauge
Make a gauge swatch with your chosen:
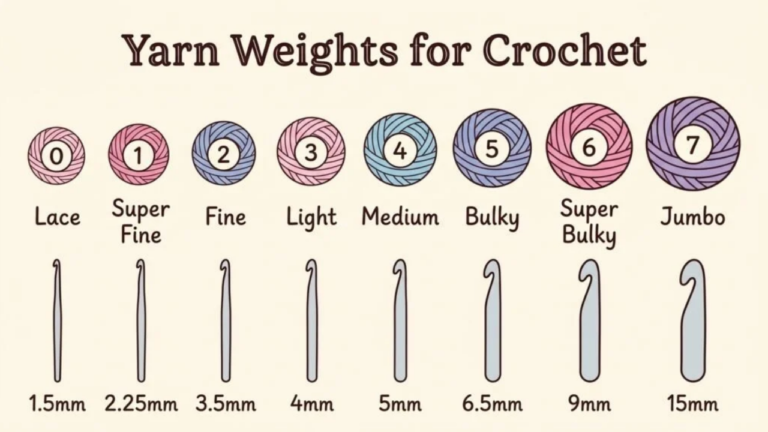
- Yarn weight
- Hook size
- Stitch pattern
This ensures your measurements will be accurate.
3. Try It On As You Go
If the recipient is available, try the hat on during construction. This is especially important for:
- Babies (heads grow fast!)
- People with larger or smaller than average heads
- Custom orders
4. When in Doubt, Go Bigger
- For babies and children: They’ll grow into it
- For adults: A slightly loose hat is more comfortable than one that’s too tight
- For gifts when you don’t know the size: Adult Medium is the safest bet
5. Adjust for Hair Thickness
- Thick hair, locs, or braids: Add 2-3 cm to the hat circumference
- Very short or no hair: Use the smaller end of the size range
Common Crochet Hat Sizing Mistakes (And How to Avoid Them)
Mistake 1: Not Accounting for Stretch
Solution: Always stretch your work slightly when measuring width.
Different yarns have different stretch factors.
Mistake 2: Making the Height Too Short
Solution: Beanies should cover the ears comfortably.
When in doubt, add an extra cm or two.
Mistake 3: Using the Wrong Measurement for Flat Patterns
Solution: Remember that flat width ≠ head circumference.
The hat stretches around the head.
Mistake 4: Forgetting About Brim Style
Solution: Decide if you want a folded brim BEFORE you start and use the correct height measurement.
This sizing guide works with any crochet beanie pattern.
For a complete step-by-step tutorial on how to crochet a beanie using the flat method with these exact measurements, check out my YouTube channel for video demonstrations.
Save this crochet hat size chart for your next project! With these measurements, you’ll never have to guess at sizing again, every beanie will fit perfectly the first time.
Happy crocheting!
2 comments